I know I know….. more Valentine’s Day stuff – this time it will be sweet, I promise 🙂
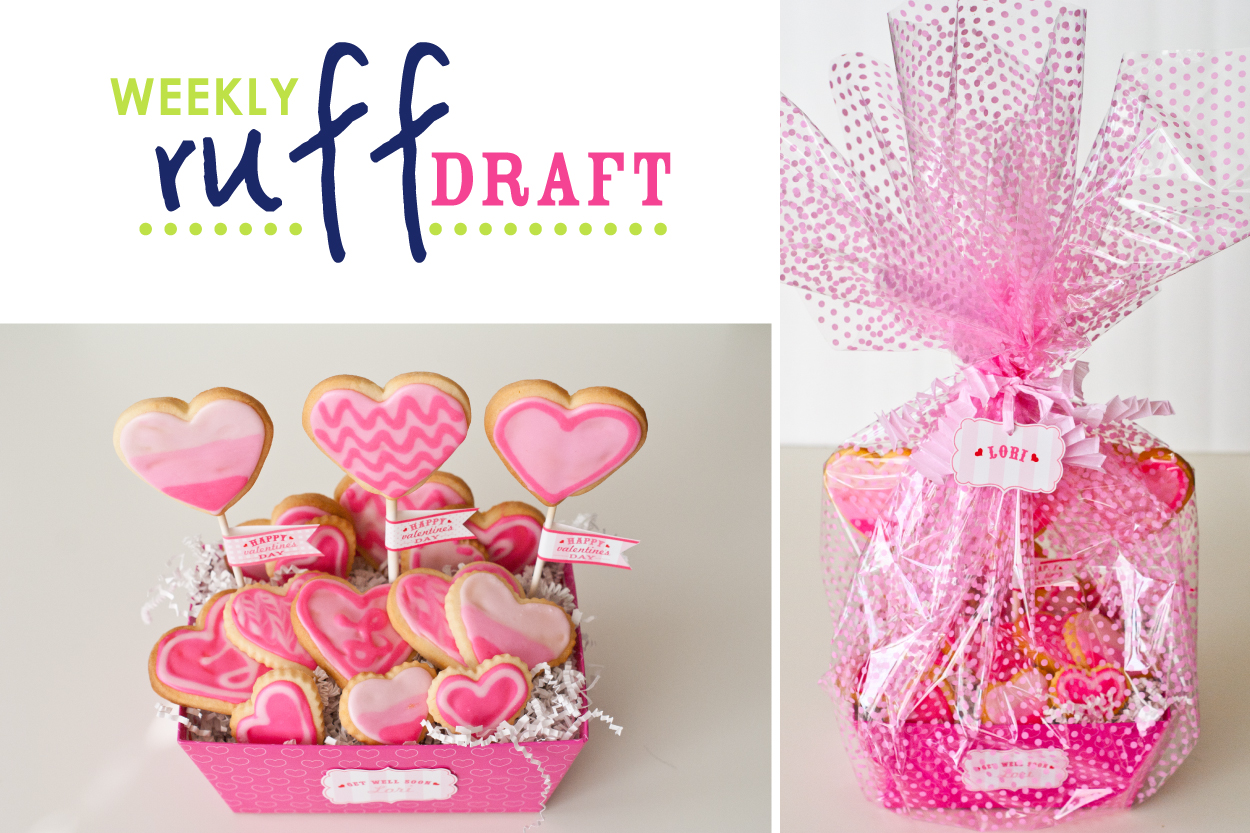
Maureen’s dear friend Lori was hospitalized last week, and Maureen wanted to do something special for her. Lori loves Maureen’s homemade sugar cookies, so Maureen whipped up a batch. (Don’t worry, I’ll give you her secret recipe at the end of the tutorial!)
Since she was making a gift basket, I asked her if I could show everyone some of our little tricks when creating packages.
Supplies needed:
– SWEET SHOPPE Valentine’s Day Printables
– A basket/container (we found our v-day heart container at Target)
– Floral styrofoam
– Shred
– Cookies and Cookie Pops (homemade or fabulous cookies from professional bakers. We have our favorites ;-))
– Clear cellophane – cut big enough for container items
– Raffia
————————————————————————————————–
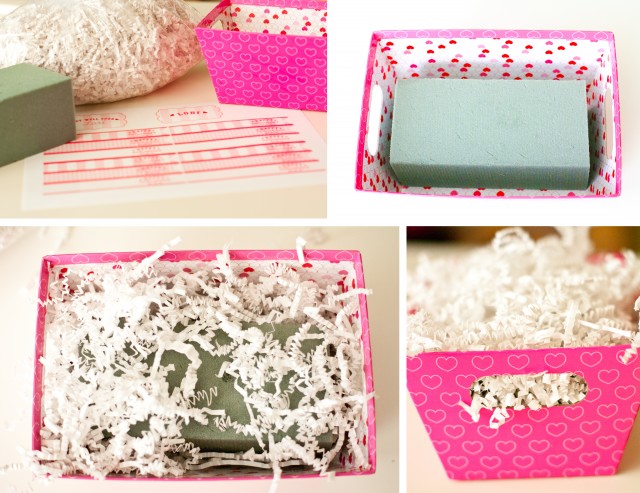
First you need to trim your Styrofoam to fit into the container. (We use bread knives to slice through the Styrofoam – and the Styrofoam is the little trick we use to hold cookie pops/lollipops/cake pops, etc)
Next fill with shred.
Once your container is filled with shred, print/cut/adhere Valentine’s Day Printables to your container and cookie pops.
Carefully insert each cookie pop into the Styrofoam that is hidden in the container.
Fill the container with remaining cookies! – Easy, right???
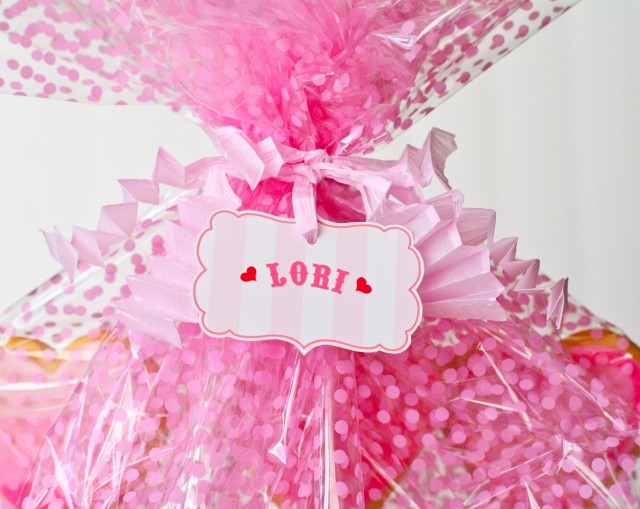
To package the cookies, take your clear cellophane, and wrap around container – tie shut with raffia and add hang tag.

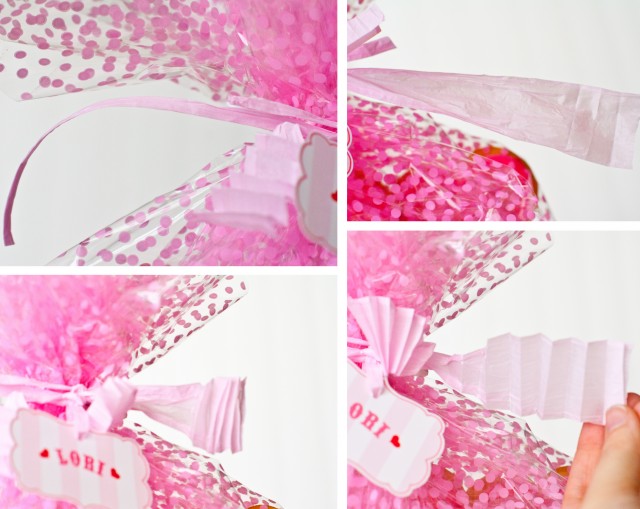
Here’s another little trick to make your raffia look fancy….
Unfold the raffia so it looks more like tissue paper.
Then accordion fold each piece from the end back to the neck of cellophane wrap.
Once you accordion fold it to the neck, then lightly stretch it out. Now you have fancy raffia! It takes minimal time, and makes a big impact!
There you have it – a super cute and super sweet Valentine’s Day Cookie Basket!
Now for Maureen’s sugar cookie recipe: (did you notice the detail of her frosting?… AMAZING – I’ve made cookies with her, and mine never look that good)
Ingredients:
1 cup of butter (2 sticks)
1 1/2 cups powdered sugar
1 egg
1/2 teaspoon vanilla
1 teaspoon almond flavoring
2 1/2 cups flour
1/2 teaspoon baking soda (you can omit this b/c it will keep shape better if you don’t use it)
1 teaspoon cream of tartar
——————————————
Directions:
Mix sugar and softened butter. Stir in egg, vanilla, and almond flavoring. Blend dry ingredients together. Mix everything all together. Refrigerate at least 3 or 4 hours or over night.
When ready to cut cookies out, take enough dough to form a hand sized ball. Knead dough until soft enough to roll out on a floured surface. With floured rolling pin, roll dough to approximately 1/4″ thick. Cut out shapes with assorted cookie cutters.
Place on cookie sheet approximately 2 inches apart. Bake at 375 degrees for 7-8 minutes, or until edges are lightly browned. Cool completely before frosting.
FROSTING RECIPE
Start with approximately 2 tablespoons of softened butter. Add 1 teaspoon vanilla. Gradually add 1+ cup of powdered sugar and a little milk while blending. Add salt to taste and add more powdered sugar and milk to desired thickness. Add desired food coloring to your liking.
Tip from Maureen – when you frost the initial layer give your cookie a “shake” to make it look really smooth! Your icing needs to be thin enough to do this but making it too thin makes it drip off the edges. It’s a fine balance! 😉
Give a gift to someone you love and happy baking!!!


Love it!!!!
That is absolutely darling! Fabulous that you just “whipped” that up!
This is stunning! I always struggle to know how to package things, but this is amazing and would impress anyone receiving it as a gift. Thank you so much for sharing!
Super cute! Anyone would love to receive that! Thank you for sharing the recipe and the ‘how to’! I am planning my 9 year old’s sleepover birthday party and will have to order some printables!
So cute! Looks fab!